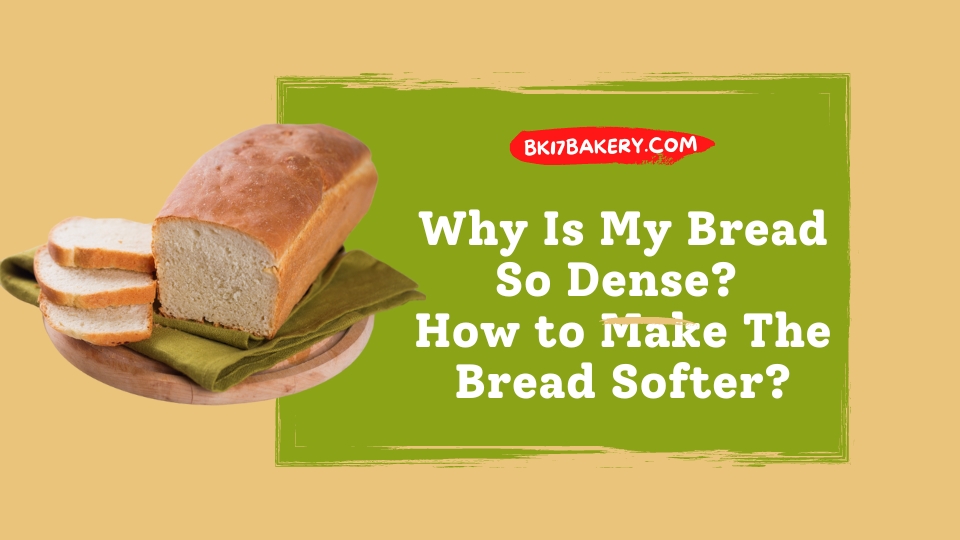

Dense bread loaves are probably the worst nightmare for all breadmakers like me: they are hard as bricks and quite a pain to sink my teeth in!
Most people would throw their dense bread away and turn it into another treat, but not me; I have discovered some amazing solutions to save my loaf of bread and make it airier, fluffier, and less hard.
Keep scrolling to learn how I did it.
In This Article
Why Is My Homemade Bread Too Dense?
There are a lot of reasons behind the dense texture. However, wrong flour type, excessive flour, insufficient moisture, too-hot kitchens, improper ingredient measurements, and under-kneading are arguably the most popular.

1. Wrong Flour Type
As flour has always been the most important element during baking, I am unsurprised that the bread might turn heavier and denser upon wrong flour usage.
To make fluffy and light bread, high-protein flour is a must. Its low-protein counterpart, otherwise, is too weak to form consistent gluten networks and, as such, weakens the dough’s texture.
I always remind myself to check the protein content before buying flour from any supermarket or grocery store. To each their own – but 10% to 13% protein in a flour package should be a good start.

All of my bread batches feel so soft that they almost melt against my tongue – something I never expected, considering my average baking skill!
Some bread recipes may mention the specific name of the flour brand; if possible, it would be best to use that exact brand during your baking.
2. Excessive Flour
Aside from flour type, you should keep in mind the amount, too. Even with the right brand and variety, the flour might still harden your bread if applied to improper degrees.
Adding more flour than necessary has always been a common mistake for beginners – including me during my earlier days – since we did not yet understand how the dough is supposed to feel like.
Let me debunk the mystery for you: the dough must feel soft and slightly sticky once the dry and liquid ingredients have been mixed together.
If it already seems overly sticky, stop adding any extra flour to the batch. Instead, move the dough to another surface and knead it immediately; that way, the bread will lose some stickiness and return to how it should be.
3. Insufficient Moisture
Sometimes, lack of bread moisture might also play a role in your dense bread. Specifically, adding too little water to your flour causes the texture to feel rough and dry, keeping the yeast from developing and working its magic.
If you are a beginner, be patient! I have been there, too, and it took lots of experiments and failures before I could learn the specific water requirements for each of my recipes. Just keep practicing, and progress will arrive at your door soon.
4. Too-Hot or Too-Cold Kitchen
Seasoned bakers have long figured it out, but I know many newcomers are still shocked when they find out the kitchen temperature is tightly connected with the bread’s texture!
Under warm temperatures, the yeast will ferment much faster than usual, causing the bread dough to rise too fast to its fullest capacity and collapse just as quickly. No wonder it feels so ridiculously thick after proofing!
On another note, too-cold rooms would not work, either; the yeast will either refuse to ferment or do so very slowly. The severe lack of gas and fermentation robs the bread of its airiness, leaving behind only heavy and dense textures. In that case, the best bet is to extend its proofing or move the bread to a warmer place.
5. Wrong Measurements
I have used measuring cups for YEARS before realizing that their marked lines are designed all wrong. After that, my family members all switched these cups to scales instead. I strongly suggest you do the same for your types of bread!
Failure to find yourself a good and accurate measuring instrument will increase the risks of thicker bread dough than required. That explains why your baking results turn out so dense and stuffy.
6. Under-Kneading
Most beginners often grow exhausted at the dough-kneading steps, sometimes even skipping the entire step altogether.
Do not follow in their footsteps: kneading is considered the groundwork of any baking process, promoting gluten development and speeding up yeast fermentation. As the yeast absorbs the flour and sugar, it releases gas bubbles, which then make the bread less dense and more airy.
Long story short: poorly-kneaded bread dough manifests poor-quality texture!
A typical knead-doughing stage should last about 15 to 20 minutes. Whenever getting tired, I will give myself a quick break (about 3-5 minutes) before getting back to kneading. I keep going back and forth that way until the dough reaches its desired consistency.
Another great solution to lessen the burden is to purchase mixers. However, do not settle on standard or handheld mixers: they are for all-purpose usage and far from enough for tough dough kneading. Instead, you should consider using Danish dough whisks or specialized baking mixer bowls.
Readers also ask me how I realize the kneading is enough and stop before overdoing it. Simple: I have learned a smart trick from my grandma – a famous cook in our town – called “windowpane tests.”
I take a small dough piece for the test and stretch it with my two fingers and thumb. If the dough stretches thin (to the point that I can even see the lights piercing through it) without breaking and tearing, then it has passed the test and is now ready for proofing.
7. Wrong Molding
Do not just ball the dough half-heartedly; take time to do it properly to create sufficient tension and keep the dense texture at bay.
Poorly-shaped bread dough can never rise to the intended level; instead, it will curl into a super heavy bread loaf and ruin all your hard work.
My favorite all-time solution is to tuck my dough straight into its center. That way, I can create tension for the bread’s outer parameter, giving its ample room to develop and grow airy.
8. Insufficient Baking
Underbaking is the biggest culprit behind a too-dense cake. Sure, the recipe will specify how long is needed for bread baking, but it is your oven that decides the total time!
To check whether the bread has been fully baked, you can use food thermometers for instant, accurate readings. Properly-baked cakes should have an internal temp of 190 to 210°F.
And what if you have no thermometers around the house? Take the bread off the oven to tap its bottom. Hollow sounds mean it is ready to be served.
9. Over- or Under-Rising
The dough will only grow fluffy and airy when you give it enough time for development. As it is one of the most critical stages in the entire process, I always let my dough rise twice (sometimes even thrice) for optimal texture and form.
Both over-proofing and under-proofing are unacceptable. To ensure your bread does not fall into either case, I suggest doing a “poke test”: as its name implies, simply poke it with one finger to see what happens:
- The dough quickly returns to its original shape: You should give it more time to be proofed.
- The dough slowly recovers: your dough is proofed well, ready to be processed in a conventional oven.
- The dough does not even spring back: it has been over-proofed
10. Improper Activation or Wrong Yeast
As stressed several times already, yeast fermentation is the decisive line between good and bad bread. Kitchen temperature aside, remember to add some warm water to the yeast to make it work, too.
Too-hot water (beyond 110°F) definitely kills off the yeast; meanwhile, water too cold simply won’t activate it. The best temperature for the extra water should fluctuate around 100 degrees.
Also, pay more attention to the yeast’s expiration date (specified on the packaging). No matter how much water you add to an expired yeast, fluffy loaves of bread will still remain out of reach!
Lastly, double-check the yeast type; avoid using brewer’s or wine yeasts, as they often go hand in hand with bitter, dense, or flatbread.
11. Too-Deep Scoring
At first glance, scoring seems super straightforward: you only need to make some cuts on your bread product before baking!
Some of my children even mistakenly assumed that I only scored the bread to give it a more attractive look; I had to explain to them that scoring involves more expertise than one would think.
That’s right; too-deep scoring or too many bread cuts will allow the trapped gas inside the dough to escape, leaving behind heavy and dense bread. To avoid such catastrophe:
- Score the bread right after the proofing stage
- Make only several cuts into the dough’s top layer
- Once done with the cutting, put it into your oven quickly
12. Not Allowing Your Bread Some Cool-Down Time
Most people are tempted to serve the bread immediately after baking. The idea sounds lovely, but hold up: give your bread some time to cool down first.
You don’t have to cover it with wrappings, towels, or anything; simply leave it on the rack and let excess moisture escape. If you draft a cloth or towel over it, the moisture will stay trapped inside, meaning you still end up with a loaf of stuffy bread.
13. Expired Flour

Whole-wheat and specialty flours rye, for instance, go bad pretty fast.
Even regular bread and all-purpose flour also have expiration dates, so keep tabs on that issue and do not let foul flour spoil your quality bread loaves!
14. Too Much Add-Ins
Though less common than other reasons, added ingredients like nuts, seeds, or fruits might also weigh down the dough. If you suspect it is the reason behind the bread’s dense texture, try reducing or cutting them from the formula.
15. No Salt
People that follow a strict low-salt diet often want to remove the salt entirely from their baking formula. Do not do it; that is a huge mistake!
Without any salt to control the yeast fermentation, it will develop too quickly for our liking, exhausting the dough and eventually hardening the bread.
How to Make Bread Less Dense?
Activate the yeast, give the dough more kneading/proofing time, adjust the water level, and use folds and stretches for bulk fermentation; all can correct your poorly made bread.

In some cases, the bread might still not turn out exactly how you want; but at least it does not become a baking disaster.
1. Proof The Dough Longer
As explained, under-proofing has been among the most popular reasons behind a dense bread texture.
To tackle the matter, simply let your cake rise longer, and use the poke test I mentioned above to check whether it has been well-proofed.
2. Give Your Yeast Better Environment
While it is still not too late, tick these four checkboxes to save your bread:
- If the proofing temp is too cool: increase it
- If the yeast is expired: scoop it out to put in a new yeast
- There was too much sugar or salt: remove them or add some water
- Not enough yeast: add more yeast to your recipe
Straightforward, right? Once, I found out my yeast had expired amidst the fermentation process; switching to new yeasts extended the baking time longer than I liked it, but at least my bread didn’t turn into a complete disaster.
3. Activate The Yeast
A severe lack of produced gas might stem from expired yeasts or yeasts that need blooming/activating.
If the latter is your case, things become much more straightforward: activate the yeast, then add some water to the yeast to test whether it works. Bubbles showing up after 7-10 minutes mean you are ready to go!
4. Knead The Dough For Longer

To save an under-kneading dough, go back and give it some more kneading time.
Use slow mixing first (3 to 8 minutes), then increase your speed in about 5 to 8 minutes. Every few minutes, test the dough’s condition via the windowpane test I described above.
5. Use Folds and Stretch For Bulk Fermentation
For those planning to perform bulk fermentation, using folds and stretch will be a great idea.
I use them for my baking fermentation from time to time to fix my dense bread, too, and the change is instant: these instruments re-align and stretch the gluten matrixes, which, in turn, redistribute the ingredients and dough’s warth to accelerate the fermentation and gluten development.
My entire batches turn out soft and super fluffy as a result.
6. Adjust The Water Level
Too little water will damage the gluten during kneading, while too much of it might flood the gluten strands, making it incapable of supporting the aerated structure of your bread.
Keep an eye on the water amount to make amends when necessary: for instance, if the dough has already been over-filled with water, stop adding more water in the next stages.
Another great tactic is to change your current flour.
Different flour types have different protein content, but in general, you only need to remember this golden rule: for every 1% increase in the protein, add 5% more liquid/water.
Extra Tips to Make Fluffy White Breads
- If you are still a beginner and cannot yet figure out the differences between different flour types, sticking with all-purpose flour would be the safest.
- To yield a softer result, you may use vegetable fat, lard, or olive oil to tenderize/lubricate the gluten content.
- Avoid adding steam, unless the recipe specifically requires so
- Eggs will work great in dough softening, as they contain lots of fats and protein. So if you do not have any allergy or sensitivity towards them, include some in the formula.
- Sealing the bread in airtight bags (before putting it in the fridge) will keep it soft for days or even weeks.
See more: How Long Does Bread Last In The Fridge or Freezer? How to Store?
Is It Okay To Eat Dense Bread?
Yes. Guaranteed that it still includes all the right ingredients and has gone through the basic baking steps, the bread is still edible at the end of the day. Sure, the flavors might not be up to your preference, but there is no reason to throw the entire batch away.

Conclusion
My guide has listed some common reasons behind a dense loaf (mostly involved with the dough and fermentation) and how to make bread fluffier. If you still have questions, feel free to reach out.