Achieving the perfect rise in your baked goods hinges on understanding the nuances of temperature to proof bread. The right warmth can transform a dense dough into an airy delight. Follow me, as I’ll unravel the art of controlling proofing bread dough temperatures, demystifying the science behind impeccable fragrant bread, pastries, and more.
In This Article
Best Temperature For Rising Bread Dough
The optimal proofing temps for bread typically range between 75°F and 78°F (24°C to 25°C), which is just right for the dough to rise and pull out its best flavor. Some bread types might require 85°F to 90°F (29-32°C).
This internal temperature range encourages proper yeast dough activity and fermentation stage, resulting in well-risen, flavorful homemade bread. However, always refer to your specific recipe for precise temperature recommendations.
For Sourdough
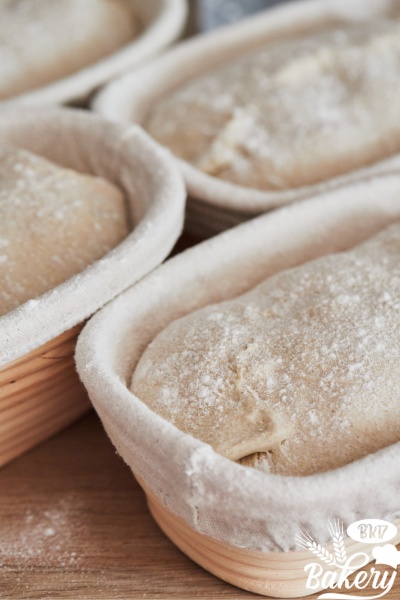
Sourdough enthusiasts understand the importance of controlled fermentation. To achieve that signature tang and an airy crumb structure, opt for an ambient sourdough proofing temperature of around 78-82°F (25-28°C). This range encourages a slower rise, allowing the wild yeast to develop complex flavors while ensuring an open, well-structured crumb.
For Sweet Bread
When crafting sweet, tender bread, a slightly warmer proofing temperature of 85-90°F (29-32°C) is ideal. This minimal heat accelerates yeast activity, enhancing the softness of the crumb and intensifying the sweetness. A touch of warmth yields loaves that are not only visually appealing but also irresistibly delightful.
For Artisan Bread
Artisan bread is a testament to the beauty of contrasts – crisp exteriors and chewy interiors. Achieve this dynamic duo by proofing at 75-80°F (24-27°C). I was surprised when opening the oven and seeing my Artisan bread coming out with a coveted crust while maintaining an indulgent, chewy inside.
For Pastries
The world of pastries demands finesse and precision, reflected even in the proofing temperature. For light, flaky layers, I always keep the temp at 70-75°F (21-24°C).
This slightly cooler proofing environment maintains the integrity of flavored butter layers, ensuring your croissants, puff pastry, and danishes achieve that sought-after delicate, light-as-a-feather texture.
DDT (Desired Dough Temperature) Calculation Guide And Detailed Temperature Table
The appropriate water temperature for each dough is calculated using the DDT formula. Here is the basic formula that you can apply:
DDT x 3 – Room Temps – Flour Temps – 18 = Water Temps (°C)
Let’s apply this formula to a specific example. Let’s say the room temperature is 27°C, the flour temperature is 20°C, and the desired dough temp is 25°C
25×3 – 27 – 20 – 18 = 10
This means your temperature water must be 10°C.
You can also apply this calculation for Fahrenheit degrees. Still, subtract 30 instead of 18.
I understand that you might not want to do math while baking. Thus, I’ve made this table of ideal temperatures for some of the most common bread types. You can apply this to your cooking and achieve the best results with ease.
| Type of Bread | Dough Temps | Dough Proof Temps | Duration of Bulk Fermentation | Total Time of Fermentation |
| Pullman loaf | 84°F / 28°C | 100°F / 38°C | Nil | 60 – 90 minutes |
| Soft Rolls | 84°F / 28°C | 100°F / 38°C | Nil | 1 hour |
| Artisan bread loaf | 77°F / 24°C | 80°F / 26°C | 3 – 5 hours | 2 – 3 hours |
| Baguette | 77°F / 24°C | 80°F / 26°C | 90 minutes | 1 hour |
| Light sourdough bread | 77°F / 24°C | 72 – 79°F / 21 – 25°C | 4 – 5 hours | 3 – 4 hours |
| Traditional sourdough bread | 84°F / 28°C | 88 – 94°F / 31 – 34°C | 3 hours | 2 – 3 hours |
| Sweet bread | 77°F / 24°C | 81°F / 27°C | 1 – 2 hours | 1 – 2 hours |
| Croissant & pastries | 69 – 75°F / 20 – 23°C | 81°F / 27°C | 2 – 4 hours | 2 hours |
| Rye bread | 84°F / 28°C | 81 – 84°F / 27 – 30°C | 90 minutes | 1 – 2 hours |
Tips On Choosing The Correct Proofing Temps
As you embark on your baking journey, remember that proofing temperatures are more than a mere technicality – they are your gateway to creating bakery-worthy delights.
Whether you’re after speed, distinct flavor, texture, shelf life, or manageability, understanding and harnessing the power of proofing temperatures will transform your warm kitchen into a haven of mouth-watering creations.
Warmer Environment Can Speed Up The Process
When time is of the essence, a warm environment can expedite the proofing process. I usually use this trick when I’m in a hurry yet still want freshly baked classic bread for my kids.
Elevating the temperature of your proofing area accelerates yeast activity, prompting swift fermentation. This technique is particularly handy when you’re in a rush, allowing you to enjoy your baked goods sooner.
Cold Temperatures Enhance Flavor
For those who value complexity and depth in flavor, cooler proofing temperatures are your ally. Gentle, cooler environments provide the ideal conditions for yeast to produce a richer spectrum of flavors, resulting in a more nuanced and satisfying taste profile.
Lower Temps Come Better Texture
My grandma was a professional baker, and she taught me basically everything I know about baking. She told me: The secret to achieving that coveted light and airy texture lies in lower bread proofing temperatures.
Cooler settings allow the dough to rise gradually, promoting an even distribution of air pockets and a finer, softer crumb. The result? Baked goods that are a delight to sink your teeth into.
Cooler Temps Lengthen Shelf Life
If you’re aiming for longevity, opt for cooler temperatures. Slower fermentation at lower temperatures not only enhances the dough’s structural integrity but also extends the shelf life of your baked goods. Say goodbye to premature staleness and enjoy treats that stay fresh for longer.
Lower-Temps Proofing Makes The Dough Easier To Be Managed
Navigating sticky, unruly dough can be a challenge, but I have found out that lower-temperature proofing can help solve the problem. The cooler and drier environment imparts a firmer texture to the dough, making it easier to handle, shape, and work with.
This means less mess, more precision, and a stress-free baking experience with consistent flavor outcome.
How To Know Proofing Is Done
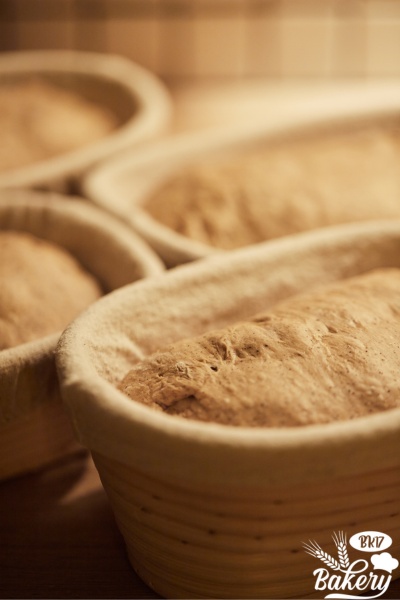
There are a couple of ways to let you know when the proofing process is done. Still, the most common methods are determined by the look and the feel of the dough. Here’s how my bread is supposed to turn out every time.
- Look: My dough needs to be roughly doubled in size since it first began. When the bowl of dough is covered with plastic wrap, I mark the outline of the dough with a marker. Once the dough expands past that mark by roughly twice, I will know that the dough is finished rising or proving.
- Feel: Successfully risen/proofed bread dough will gently rebound after being pounded and leave an impression. This is what I look for whenever I bake some bread. Notice that it needs additional proofing time if it reacts too rapidly.
See more: What Temperature Is Bread Done? Internal Temp Explanation
Frequently Asked Questions
Can You Proof Dough In A Warm Oven?
Yes, you can proof the dough in a warm oven. Set your oven to the lowest temperature (around 100°F or 37°C) for a few minutes, then turn it off. Place the covered dough in the middle rack with a bowl of hot water. The gentle warmth helps the dough rise, but be cautious not to overheat.
How Do You Know If Bread Is Proofed?
Bread is proofed when it visibly expands, doubling in size or more, and holds an indentation when gently pressed. It passes the “windowpane test,” stretching without tearing. The dough emits a sweet, yeasty smell, and a collapsing or overly soft texture indicates over-proofing.
Do You Cover Bread When Proofing?
Yes, covering bread during proofing is crucial. A damp cloth or plastic wrap prevents the dough’s surface from drying out, promoting proper fermentation and preventing a crust from forming prematurely. This ensures the dough can rise effectively, resulting in a desirable texture and flavor in the final bread.
Final Words
Mastering the art of proofing oven temperature and knowing the best temperature for rising bread dough is crucial toward achieving that perfect loaf of bread or sandwich. From the delicate rise of sourdough to the comforting aroma of freshly baked baguettes, understanding how consistent temperature influences fermentation is a baker’s true ally.
With mindful attention to recipe guidelines, ambient conditions, and the nuanced cues your dough provides, you’ll confidently navigate the realm of proofing, ensuring each creation emerges from the oven as a delectable masterpiece, beautifully proofed and wonderfully flavorful.
